

How to Set a Static IP with Hyper-V NAT Switch: Best Practice for Stable VM Networking
🖥️ Blog Post
When operating virtual machines in a local Hyper-V environment, assigning a static IP address is often essential. Whether you are running lab servers, Active Directory, Kubernetes nodes, or test environments, relying on DHCP can introduce instability and unpredictable network behavior.
This guide walks through a clean and practical approach to configuring a static IP for Hyper-V virtual machines using an Internal Switch with NAT, while also explaining why this method is preferable in many real-world scenarios.
🔍 Why Use an Internal NAT Switch with Static IP?
Many Hyper-V users default to an External Switch, but that approach can cause IP conflicts, network policy issues, or dependency on upstream DHCP servers. By contrast, an Internal Switch + NAT configuration offers:
- Full isolation from the physical network
- Predictable IP addressing
- No reliance on external DHCP
- Easier troubleshooting and security control
This setup is particularly effective for enterprise testing, M365 labs, Intune test tenants, and multi-VM service simulations.
Step 1: Create an Internal Virtual Switch
Open PowerShell as Administrator and create an internal virtual switch.
Replace "SWITCHNAME" with your desired name. In this example, we use NAT.
New-VMSwitch -Name SWITCHNAME -SwitchType Internal

This switch allows communication between the host and VMs, but not directly to the external network — which is exactly what we want before adding NAT.
Step 2: Identify the Interface Index (ifIndex)
After creating the switch, retrieve the interface index associated with it.
Get-NetAdapter
Locate the adapter matching your internal switch name.
In this example, the interface index is 37.

⚠️ This value is environment-specific. Always verify it on your system.
Step 3: Configure the NAT Gateway IP
We will use the 10.10.10.0/24 network and assign the first IP address as the NAT gateway.
New-NetIPAddress -IPAddress 10.10.10.1 -PrefixLength 24 -InterfaceIndex 37
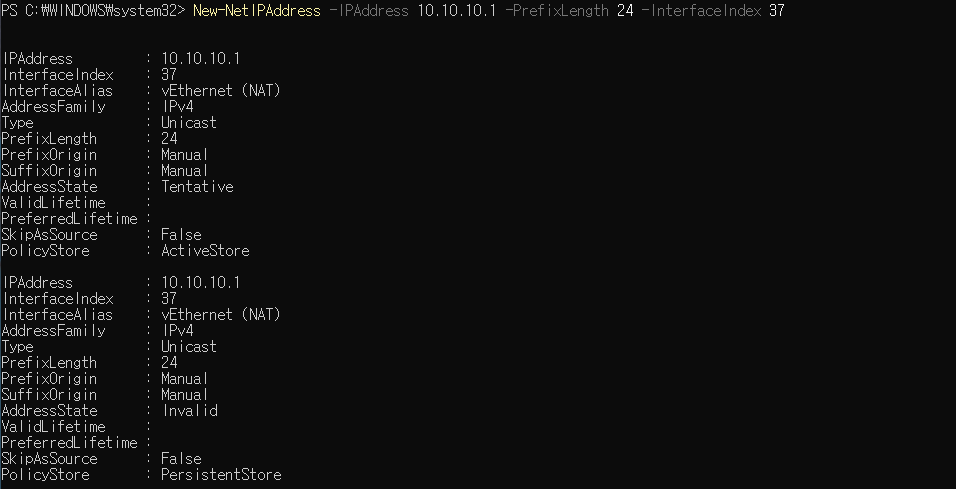
This IP becomes the default gateway for all virtual machines connected to this switch.
Step 4: Create the NAT Network
Now configure NAT so the internal network can access external resources.
New-NetNat -Name NAT-NETWORK-NAME -InternalIPInterfaceAddressPrefix 10.10.10.0/24
Example name used:
- NATSW
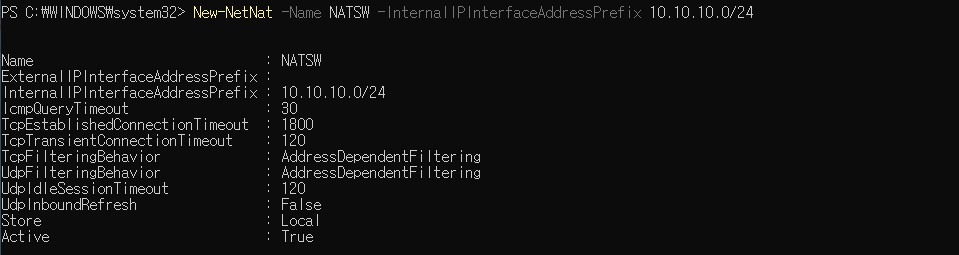
This step enables outbound internet access while keeping the internal network fully controlled.
Step 5: Connect the VM to the New Virtual Switch
In Hyper-V Manager:
- Open the VM settings
- Select Network Adapter
- Choose the newly created NAT
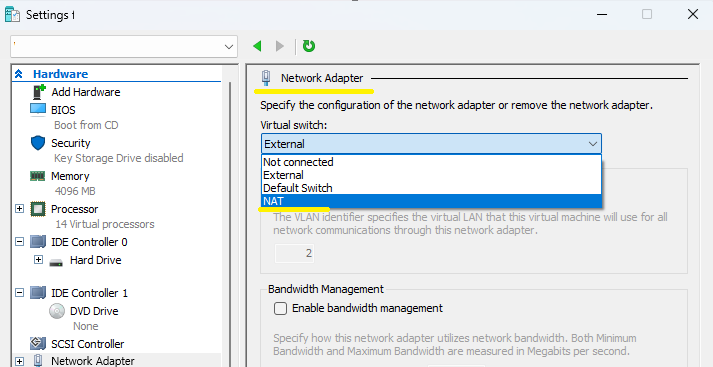
No reboot of the host is required.
Step 6: Configure Static IP Inside the VM
Assign the VM a static IP within the defined network.
Example configuration:
- IP Address:
10.10.10.10 - Subnet Mask:
255.255.255.0 - Gateway:
10.10.10.1 - DNS Servers:
8.8.8.8(Google DNS)
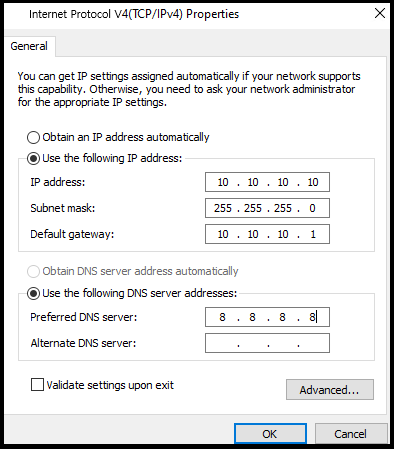
This guarantees consistent connectivity and avoids IP changes after reboots.
Operational Insights (Why This Matters in Production Labs)
From an operational perspective, this configuration mirrors real enterprise environments:
- Enables repeatable VM deployments
- Simplifies firewall and routing policies
- Ideal for AD, SCCM, Intune, Kubernetes, and SQL clusters
- Prevents accidental exposure of lab services to the corporate LAN
For engineers working in cloud hybrid, M365 migration, or infrastructure automation, this approach offers maximum control with minimal complexity.
Useful Commands for Maintenance
View Existing NAT Configurations
Get-NetNat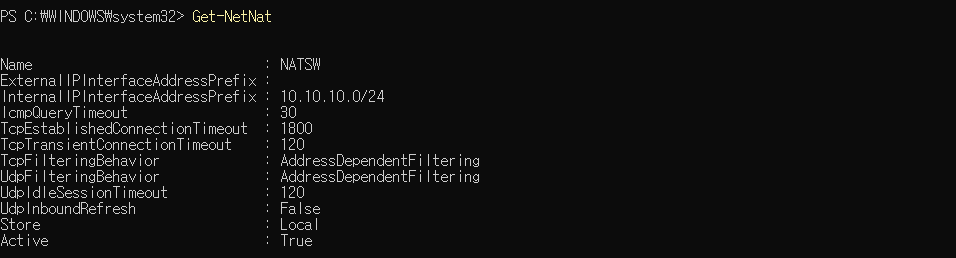
List Hyper-V Virtual Switches
Get-VMSwitch
Final Thoughts
Configuring a static IP with a Hyper-V NAT switch is not just a technical exercise — it is a best practice for building stable, secure, and scalable virtual environments. Once implemented, this model eliminates many common networking issues and closely aligns with real-world infrastructure design principles.
If you frequently rebuild labs or manage multiple VMs, this setup will save time, reduce errors, and provide consistent results.